When you have a project coming up, it can be stressful. This is completely normal, and it’s the perfect opportunity for you to harness those nerves and put your energy into showing off all that you have worked towards. The more confident you feel about your project display set-up, the more confident you will feel when it comes to showing it to your seniors or potential clients.
Here are some useful tips to help you set-up your project board:
Don’t be too hard on yourself
Set aside time to organise your board so you don’t feel the pressure to rush it. Remember you’ve put a lot of effort into sourcing the contents to put on the board, so you owe it to yourself to display it well. The very first step should be feeling confident with what you have to put onto the display, and if you don’t feel you have enough content, source it and then begin piecing the information together in ready-to-show formats. Try not to be self-critical and seek the opinion of a mentor or someone you trust to give you constructive criticism when you’ve put your display together.
Plan the layout
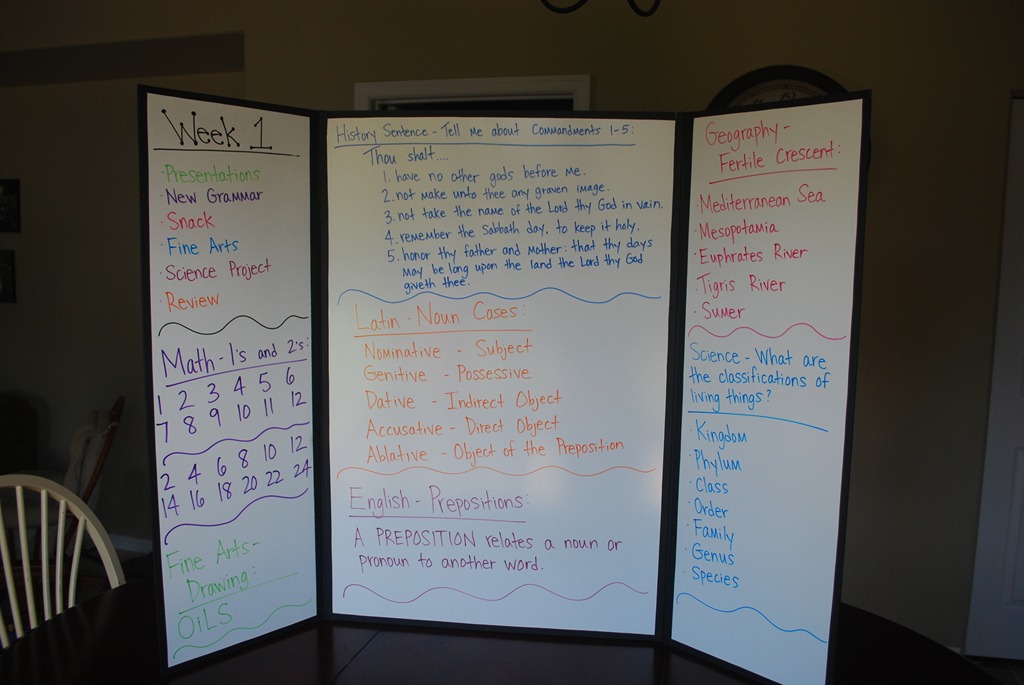
It is important you plan the layout of the board before you start adding anything to it. This is especially relevant if you need to pin paper to the board as it will quickly become crinkled and battered if it’s moved around a lot. The title of the project and the most important images should be on the centre panel.
Start with the title
The title should be in the centre panel. Use a ruler to ensure the title is in a straight line unless you plan to be creative with it and place it in a curved shape or in a caterpillar style shape. If you’re using separate cartoon style letters play around with them before attaching them and remember the more room they take up, the less room you have to display other images.
Focus on the centre panel
Focus on the centre panel ensuring you’re placing all key images, graphs and evidence there. When you’ve decided on the layout, treat the space just above each image as a chance to add subtitles. This will enable you to put the images or evidence into categories so your board looks more organised.
Move on to the side panels
The side panels will display the supporting information so try to arrange the information into two areas before you decide which side to put it on. For example; the left side of the 3 panel folding display board could be use for the background research or idea behind the project. The right hand side could display the way you explored that idea, how you explored it and the results you got from that exploration.
Create templates
If you’re moving things around a lot, use pieces of card or paper on the boards that are the same size as the one’s you will be attaching. It pays to be fairly accurate when you do this so you can feel confident that the end result will look the same as it did during practise.
How is the board being displayed?
If you’re going to be standing in front of the board try to keep all of the most important information above waist height so people can see it then they walk past. If the board is going to be used in a room full of other project boards so potential customers or management can view them (like a gallery), then use all the space available to you but remember images viewed first are more likely to be at eye level.
Give it time
If you finish your display and find yourself having a complete meltdown – stop and walk away. The best thing you can do is give yourself time to stop being self-critical so you can return and look at the board with a fresh perspective and a constructive approach. Remember why you started your project in the first place, replay your mission statement in your head. Ask yourself if the display you have created stays true to your initial intentions. If it doesn’t, amend it with your mission statement in mind. If it does, feel a sense of pride and look forward to displaying it and impressing your audience.